Table of Contents
VPN at Hamburg University
To connect to the Hamburg University network, via potentially unsecure (public) networks, it is strongly recommended to connect via a VPN (virtual private network) to establish a secure and encrypted connection. The required VPN - Client can be downloaded from the web pages of the RRZ (the computing centre of Hamburg University).
VPN installation on Windows
Download VPN – Client for Windows
How to install and configure the AnyConnect VPN – Client
- Download and install the currentCisco AnyConnect VPN-client from the RRZ-pages.
- Double-click on the downloaded file to start the installation.
- Confirm all message – boxes.
- When the installation is finished, you'll find a new entry under:
'Start'→ 'Alle Programme' → 'Cisco' → 'Cisco' → 'Cisco AnyConnect Secure Mobility Client' - click on the entry 'Cisco AnyConnect Secure Mobility Client' to start the VPN-client
Configuration
The next step you only need to perform when you establish a connection via the Cisco VPN - client for the first time. Please enter the address of the VPN – Gateway (vpn.rrz.uni-hamburg.de) as can be seen in the graphic below:
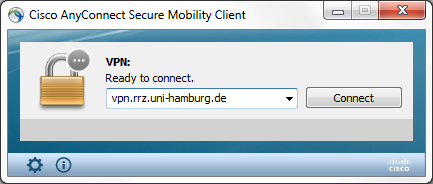
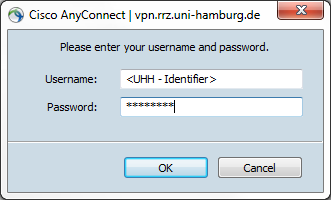
Now click onto the 'Connect' – button. While the connection is being established you'll be prompted to enter your UHH – identifier together with your password into the following dialog – window:
After a successful connection buildup a message will be displayed above the lower right corner of the task – bar:

A successful connection can also be noticed by the small spherical icon with a lock in front of it.![]()
VPN installation on OS X
How to install and configure the AnyConnect VPN – Client on Mac OS X
- download the most current Cisco AnyConnect VPN Client from the RRZ web pages
- double-click on the downloaded file, a new window opens
- in this window double-click on AnyConnect.pkg to start the installation
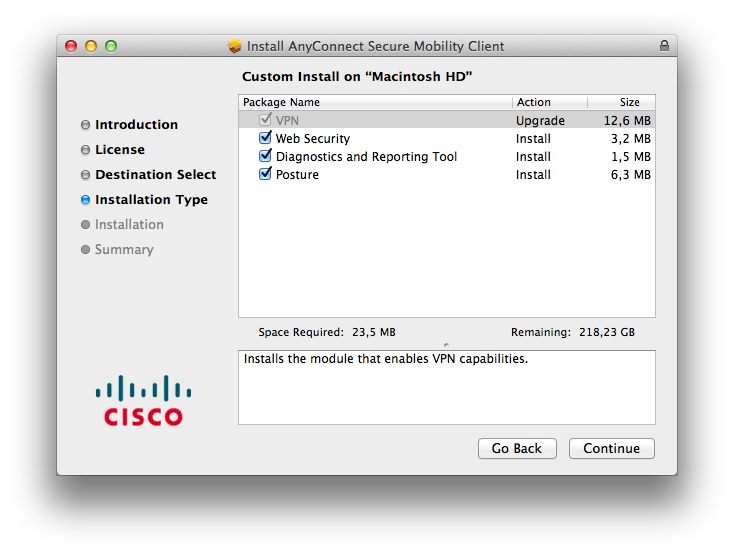
- during the installation process confirm all messesage-boxes until your are about to choose the installation type (see graphic below):
Remove the checkmarks in front of 'Web Security', 'Diagnostics and Reporting Tool' and 'Posture' and confirm your changes by pressing 'Continue'.
The configuration should look like this now:
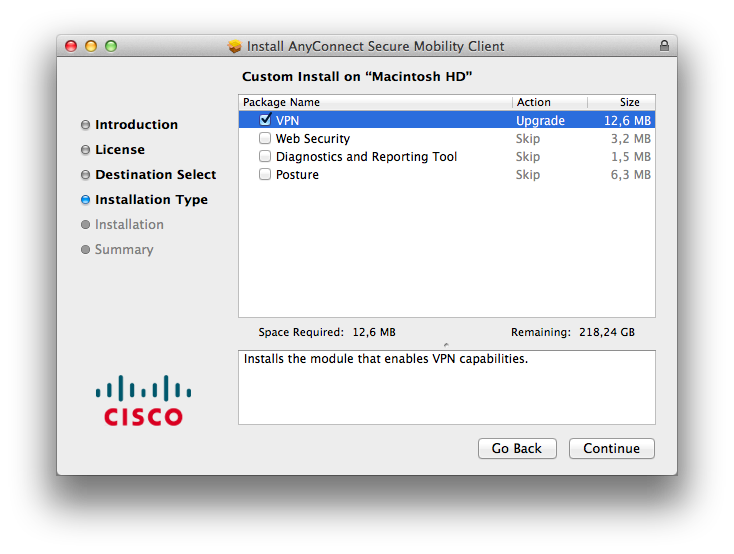
To proceed with the installation confirm the selection by pressing 'Continue'.
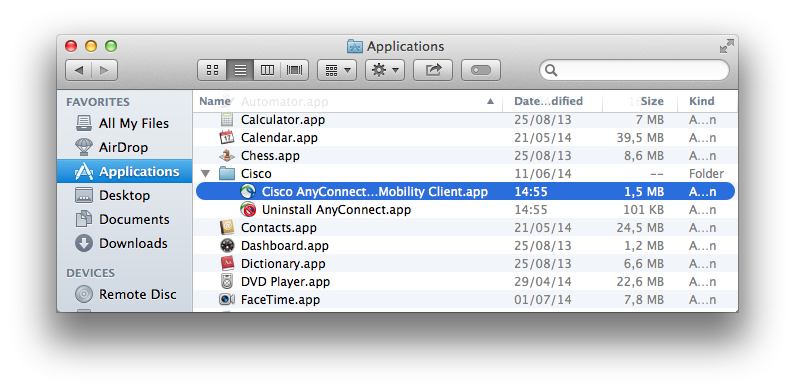
When the installation is finished you'll find a new entry under:
→ Applications → Cisco → Cisco AnyConnect Secure Mobility Client.app (see pic. Below):
Configuration
The next step you only need to perform when you establish a connection via the Cisco VPN - client for the first time. Please enter the address of the VPN – Gateway (vpn.rrz.uni-hamburg.de) as can be seen in the graphic below:

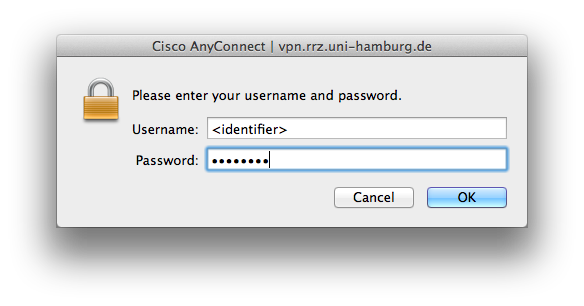
Now click onto the 'Connect' – button. While the connection is being established you'll be prompted to enter your UHH – identifier together with your password into the following dialog-window:
After a successful connection buildup a spherical icon with a lock in front of it will appear in the dock. (only temporary, whole VPN is in use)

Furthermore, the state of the connection can be viewed in the menu-bar at the upper margin of your display.

VPN installation on Linux
The Computing Centre has instructions (in German), how to install the Cisco Anyconnect Client under Linux (Ubuntu). However, we recommend rather to use OpenConnect, which in most Linux distributions can be installed directly from the package sources.
For Debian / Ubuntu and derivatives, please enter the following in the command-line:
sudo apt-get install --install-recommends network-manager-openconnect-gnome
sudo service network-manager restart
After installation click on the network-symbol, choose in the menu “VPN-Connctions” → “Configure VPN”.
In the new window, click the button “Add”, and you will see a new window “Choose Connection Type”.
Choose in the dropdown-list to the entry “Cisco AnyConnect compatible VPN-Connection (openconnect)” and click the button “Create”.
In the VPN-Configuration window choose as connection name for example “UHH-VPN”. Enter the following in the Tab “VPN”:
Gateway: vpn.rrz.uni-hamburg.de
CA-Certificate: /etc/ssl/certs/Deutsche_Telekom_Root_CA_2.pem
Leave the standard-settings in the remaining fields and click the button “Save”.
To login to the VPN please provide your UHH-Account-Name: e.g. fmnv165, followed by your RRZ-Password (same password as for your email-account).

